
Storytime: "How I got into make up" + [EASY SPRING MAKEUP TUTORIAL]
- Pa Ziab Lor

- Apr 20, 2019
- 4 min read
April 18, 2019
Hello friends! Last, week Breanna shared 5 things to throw out in Spring and it’s now my turn to put my very first blog post up! As mentioned, we are taking turns writing blog posts weekly and these blog posts are comprised of a myriad of miscellaneous topics that may be of interest to you or your friends. If you haven’t yet, check out Breanna’s post or the author space to learn more about me and the other writers at PB&K. I will be mainly covering topics on beauty, but that doesn’t mean there isn’t room for other discussions.
STORYTIME
I thought as a beauty blogger, I might share a short story on how I got into makeup. I started putting makeup on myself around the age of 18 when my boyfriend bought me my first set of brushes from Sigma. Prior to that, I had never really payed much attention to it. I was the kind of people who only looked nice on Sundays, while on Monday to Saturday, I lounged around in sweat pants and sweaters. Thankfully, many of the people around me were quite skilled in makeup application and would occasionally do my makeup for me. I started getting interested in makeup then and quickly discovered the process was quite reminiscent to painting and drawing. I figured I could slightly modify my facial features or cover my acne, dark circles, (which I loathe but have come to terms of acceptance with that I will be stuck with this appearance for the rest of my life and will be besieged with random questions asking whether I sleep or not), hyper-pigmentation etc. In general, I just really enjoyed creating different looks and utilizing different techniques to get the look I desired!
Funny thing is, to this day, I still spend 85% of my time in sweats with no makeup. I of course have my own insecurities but could never substitute that for comfortability. Moreover, I am quite complacent with just j the way I do, whether it be tired or plain. I wanted to mention though that I actually have something prepared for you guys below. I’m not too skilled at writing or makeup, but I brought a simple makeup tutorial to you guys below. Feel free to give some feedback or suggestions. I'd love to hear anything. Enjoy!

TUTORIAL
Speaking of throwing out things like make up in Spring, it is also time for a change in makeup routine. For my first post, I decided to share a spring makeup tutorial to help all of us transition from this past long, gloomy winter to spring, the season of rebirth and rejuvenation! Yes, it’s finally April, our long-awaited friend who is making spring happen. I’m not sure about you guys, but for spring, I am excited to incorporate fresh and clean looks that enhance my natural features or experiment with bright, lively colors. This is the perfect season to bring out the pink, coral, and peach shades buried in our dusty drawers over the long winter.
In this look, I will be incorporating a soft peach shade with a tinge of coral on a dewy base to create a daily, wearable look that will pair well with a floral dress or a casual outfit. Although I love color in my makeup, I also want a versatile look that I can wear outside. Life gets so busy that we won't always have time to blend out our eyeshadow or perfect a lip line, so I am using simple techniques and color combinations that will save time.
If you’re ready, let’s get started right away!
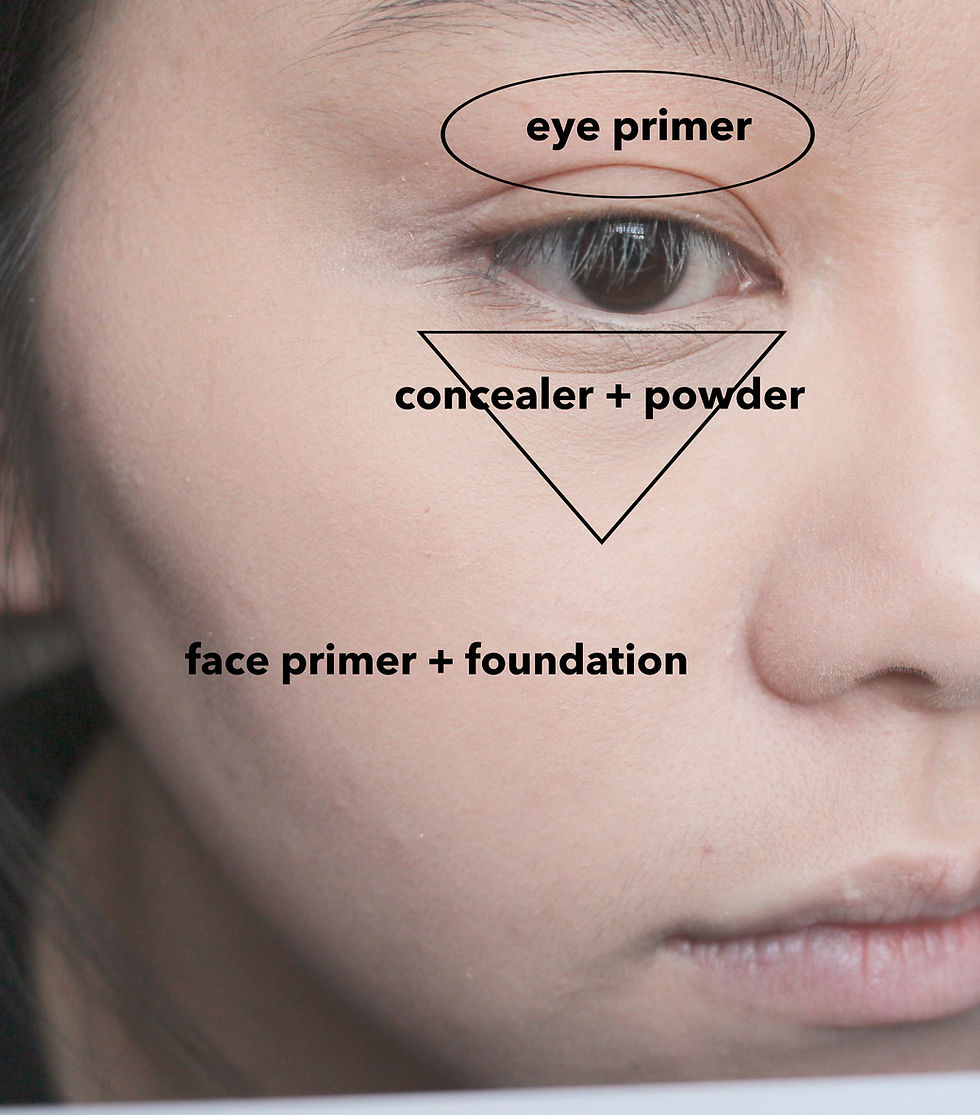
Base
After skincare, apply a hydrating face primer all over. If your eyes are oily, feel free to add in an eye primer as well. Next, apply foundation on the face with a wet beauty blender in a dabbing motion. With concealer, apply it under the eye triangularly and dab with beauty blender til the concealer is blended into foundation.
If creasing is visible under the eye, dab dab dab! If there is no creasing, apply translucent powder with beauty blender to for coverage and lasting power. Wipe away the excess powder.
Eyebrows

1. Draw the brow shape you desire
2. Fill the brow in a sweeping motion, starting from base to the top of the brow. Use spooly to blend the front of brows and harsh lines.
Eyes
1. Apply a light peach shadow all over the lid and on the eye bag
2. Add a coral pink shadow to the base of the eyelid
3. Use any brown shadow to thinly line the lash line to accentuate the eye shape
4. Apply a pinky beige shadow with a sheen, metallic finish to the center of eyelid to create some dimension
5. Curl and coat lashes with mascara

Contour/Blush

Using a neutral brown powder, contour around the hairline, nose to brow, and jaw area to define your features. Make sure there are no harsh blotches of color. If it gets blotchy, you can use the leftover foundation on your beauty blender and pat it on those areas. Then, use blush on the apple of the cheeks to bring warmth to the face.
Lips
Use the doe foot applicator to apply a lip color of your choice to the ring finger (I used a nude peach shade). Pat and blend.
Final look
Here's the final look! Excuse the messy pictures >_< I'm still not too skilled at putting a blog post together or making makeup tutorials, but I hope you found some part of it useful. I've been awfully busy while trying to put this look together and the weather has not been on my side. Thank you so much if you were able to stick around til the end. Looking forward to the next time we meet!
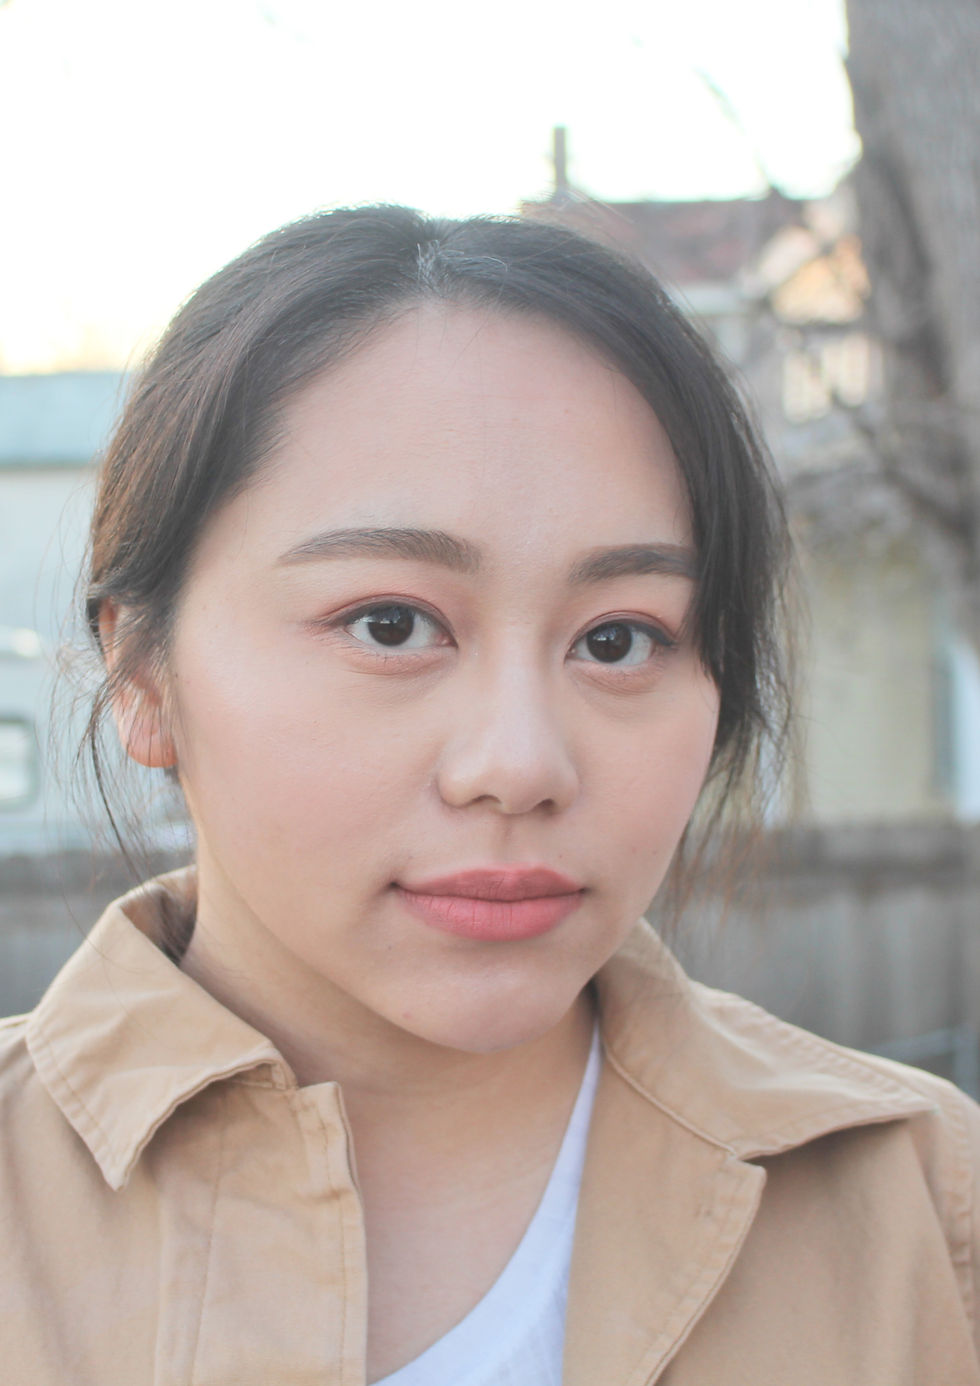
-Pa Ziab
** All products used are listed below in order
Laura Mercier Hydrating Foundation Primer
Urban Decay Cosmetics Original Eyeshadow Primer Potion
Maybelline Fit Me® Dewy + Smooth Foundation -Porcelain
Tarte Cosmetics Shape Tape Concealer - Light Neutral
Laura Mercier Secret Brightening Setting Powder for Under Eyes
Anastasia Beverly Hills Brow Wiz -Chocolate
ColourPop Pressed Powder Shadow - Issues, Centerfold, Take a Break
Kiss Me Heroine Make Long and Curl Mascara - Black
Kat Von D Shade + Light Face Contour Palette - Shadowplay
Etude House Lovely Cookie Blusher - Strawberry Choux
Etude House Matte Chic Lip Lacquer - Peach Beige


Comments